Below is a description of how to adjust the valves on a Moto Guzzi EV11. While much here is specific to the EV11 the general method can be applied to most motorcycles (with the notable exception of easy access to the cylinder heads).
If you have any doubts or concerns about doing this yourself – then take your motorcycle to a mechanic who is certified to work on your motorcycle.
What you’ll need :
Supplies
- HEAD COVER GASKETS (2)
Tools
- HEX KEY (5mm)
- wrenches (11 mm and 15/16 – I don’t have an equivalent size metric)
- FEELER GAGE
- TORQUE WRENCH (17 mm)
Make sure that the engine is stone cold before you begin. The left cover has a temperature sensor attached. Slide back the rubber cover and unhook the wiring. Using the 5mm allen wrench remove the 8 bolts (fig 1) holding on the cover. Once the 8 bolts are removed you can remove the valve cover. You should be able to reuse the gasket if you are careful with the removal of the cover. If the cover does not come off easily, lightly tapping it on the side with your fist should loosen it.
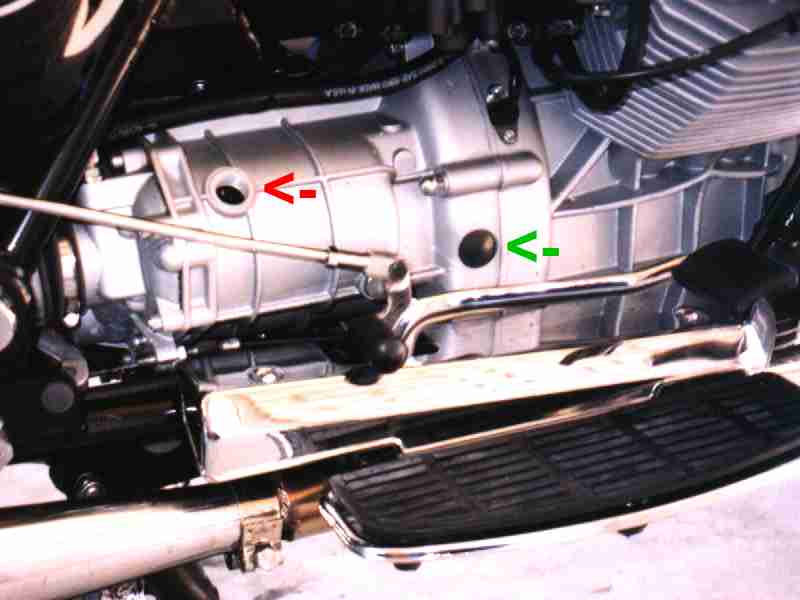 Now that the valve cover is removed the next step is to get the cylinder you are working on at it’s Top Dead Center (TDC). Popping off the small rubber cover (green arrow fig 2) will allow you to see the alignment marks on the crankshaft to help determine when the cylinder is a TDC on it’s power stroke. A “S” in the flywheel window indicates the position of the left cylinder, a “D” represents the right cylinder.
 There are 2 methods (at least) of cranking the engine to correctly position each cylinder. Before you do either – remove the sparks plugs to make cranking the engine easier. One method is to put the bike on it’s center stand and with the bike in top gear rotate the rear wheel. I prefer to use the second method and it will work even if you don’t have a center stand. First remove the alternator cover and then use a wrench (15/16) to rotate the engine’s crankshaft in it’s operating direction. The operating direction is counterclockwise (red arrows fig 3) – as viewed facing forward with the bike.
When the cylinder is a TDC on the beginning of it’s power stroke both the intake and exhaust rocker arms will feel loose. If they are not then you are at the beginning of the compression stroke and you need to continue to rotate until the next TDC.
Use the feeler gauge to measure the valve lash. Keeping a record of the valve lash before and after each service may help in identifying any problems down the road.
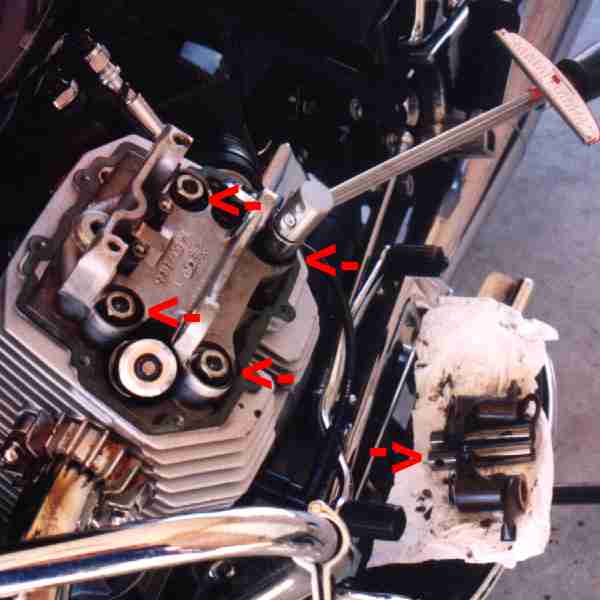 While the valve covers are off it’s a good idea to re-torque the heads. To do this you have to remove the rocker arm assembly. I haven’t seen any “official” specs for the head re-torquing but I’ve been told to use 30 ft/lbs(fig 4) . Put back the rocker arm assembly and then adjust the valve lash.
 To adjust the valve lash use a feeler gauge (fig 5) to measure the clearance between the rocker arm and the valve. To adjust loosen the lock nut (11 mm) and tighten or loosen the adjusting screw until the correct clearance is obtained. Once you have the correct clearance use a wrench to hold the adjusting screw while the lock nut is tightened.
Clearances:
| USIntake : 0.05mm (0.002″)Exhaust: 0.10mm (0.004″) | WorldIntake : 0.10mm (0.004″)Exhaust: 0.15mm (0.006″) |
According to Guzziology the tighter clearances for the US are to keep the emissions in check. While the tighter clearances do make the valves noticeably quieter I’ve found that the looser specs eliminated a very small flat spot right at 4000 RPM. Since I also did a full service at the same time as I adjusted the valves this observation may not be entirely accurate.
Put the valve cover back on and turn the crankshaft until TDC is obtained for the other cylinder and repeat the procedure.
Replace any damaged gaskets, install all covers, tighten all bolts, replace the spark plugs, cross your fingers and fire up the engine.